Survival in an unknown wilderness is not easy. But what if you get stranded in the wilderness with nothing? The very first thing you need to know is – always be ready for anything!
Don’t go walking about in the woods without a knife, a fire starter, durable flashlight, and water. Even if you don’t plan on going to any wilderness, always have some survival or emergency kit ready.
A car emergency kit comes in handy. The thing about emergencies is that they happen when you don’t expect them, so always be ready.
But no one can ever be ready for everything all the time. Though the chances of it happening might be slim, you might just find yourself fighting for survival in the wilderness with nothing but your wits and your hands.
If ever you find yourself stranded in the wilderness with absolutely NOTHING, you had better know just what to do to survive for an indefinite amount of time. This is the best way to be prepared for anything: know how to survive in the wilderness with nothing.
Disclaimer: Wilderness survival has no room for weakness. The tips discussed here are for those who are not injured or sick.
Also, the tips here only apply if you have to survive in a forest or a savanna. They do not apply if you get stranded in the middle of a desert or ocean.
Table of Contents
The Basic Necessities of Man for Survival
Humans can live with only the bare necessities and these necessities are so far from what we as a society might be used to.
The National Aeronautics and Space Administration (or more commonly known as NASA) recognizes four basic needs for human survival. We will go through these four basic needs and explain how to obtain them one by one.
These four essentials NASA recognizes are water, food, shelter, and air. Since air is pretty much available anywhere on the planet, except underwater, we will skip that. Instead, we will replace it with warmth.
Water: The First Priority
According to Medical News Today, humans can only generally survive without water for about three days only. Depending on the climate, this is your first priority. Unless if it so happens that it’s in the middle of dead winter, then your first priority is warmth and/or shelter.
Though humans can live without water for about three days, that does not mean that you have three days to look for water. A day without any water will significantly lower your body’s performance. You will get weak.
Once this happens, your chances of survival significantly plummet. You can’t afford to wait for rain. So, you have to establish a source of water.
There are a number of ways to establish a source of water. If there is a stream or a river near your location, you are in luck. These are not only a ready and steady supply of water, but can even help you get out of your sticky situation of being stranded (more on this later).
If you find these sources of water, it is better to purify the water first. No matter how clean-looking the water is, there are all sorts of contaminants in it.
The common types of water purification items you wouldn’t have in the scenario we’re discussing. But, there is a couple that will work for you.
One technique is purification using the ground. In this technique, you are using the ground as a filter. The ground should be able to filter out most of the contaminants of the water.
About two feet away from the water, start digging. Continue digging even until you encounter water. The deeper you dig, the cleaner the water will be.
The other method is boiling the water. Even if you don’t have a fire-proof container to put the water in, you can still boil your water. You can create a container using pine bark or a similar material. Put your water in it.
Start a fire (more on this later) and put rocks in it. Once the rocks are hot enough, put them in the water. Keep adding heated rocks into the water till it boils for about 5 minutes, although 20 minutes will definitely make the water safe to drink.
But if there are no creeks or other ready sources of water near you, you can employ any of these survival tricks to obtain water.
-
Use Your Shirt Or Any Piece of Cloth
The ground, especially in the early morning, holds dew. Press a piece of cloth (your shirt will do) onto the ground to collect the dew.
Other sources of dew maybe plants. Drag your piece of cloth on plants or tie them around your body and you can walk through thick bushes. Your cloth will collect the moisture around the plants. If there is a thick fog in your area, this will work, too!
You can wring the dew or moisture your cloth has collected into your mouth.
-
Follow the Ants, Bees, Or Finches
If you see ants going up a tree, it is likely that there is a small reservoir of water somewhere on the tree. You can employ the cloth technique to get that water from the tree and into your mouth. Bees and finches are animals that do not stray far from water.
-
Dig
If you can’t find any source of water, or can’t think of any potential source, your best bet is under the ground.
But, if you will resort to digging, do so at places where there is evidence of underground water. Dried up ponds or places teeming with plant life are good places to start.
-
Walk Along the Mountainside
If you are on a mountain, you can try walking along its side. Usually, there is a stream flowing down the mountain. You are more likely to encounter one if you walk along its mountainside.

Here’s something you have to remember when looking for water in the wilderness: life forms thrive near water sources. The more life forms there are in an area, the higher the chances of water being present.
Shelter: Keep the Wilderness Away
Your next priority is finding shelter, not food. If stranded in the wilderness, it is best to have shelter before dark. There are two main reasons why a shelter is one of the top priorities for survival.
The first reason is to protect yourself from wild animals. But even if there are no wild animals in the area, you still need a shelter for the second reason.
You need protection from the elements. As was already mentioned before, if it’s in the middle of winter, shelter is your top priority. If it’s not yet winter, you still need shelter to ward off rain, strong winds, and the cold of the night.
The normal body core temperature lingers around 98.6 degrees Fahrenheit (37 degrees Celsius). If that core temperature drops to 95 degrees Fahrenheit or 35 degrees Celsius, hypothermia will occur. Two degrees, that’s all it takes for you to lose your chances of survival.
Hypothermia will weaken you and can even cause you to lose consciousness. And when trying to survive in the wild, consciousness is an all-important tool.
So, how do you get a shelter, or build a shelter, to avoid the dangers of wild animals or of the elements?
One very efficient and easy technique to obtain shelter in the woods when you have nothing is the fallen debris shelter (sometimes called fallen tree shelter).
But it does not have to be that elegant-looking, because that one looks elegant-looking, all things considered. This type of shelter is quite easy to make.
The fastest way is to look for a fallen tree with one side lifted up. If you can’t find something like that, then make use of branches and create the skeleton or frame of your shelter. Then look for branches with leaves to cover the frame. As much as possible, there should be no gaps in your shelter “wall”.
The thicker the layer of leaves is, the more protected you are from the cold. So make sure that you build it pretty thick if the nights tend to get cold in the area.
If you are somehow stranded in a blizzard, there’s still hope for you. Snow is an insulator; it can keep the cold at bay. In the extreme North, snow is used to build igloos, which are used to keep people warm. But you don’t have to build an igloo to have shelter.
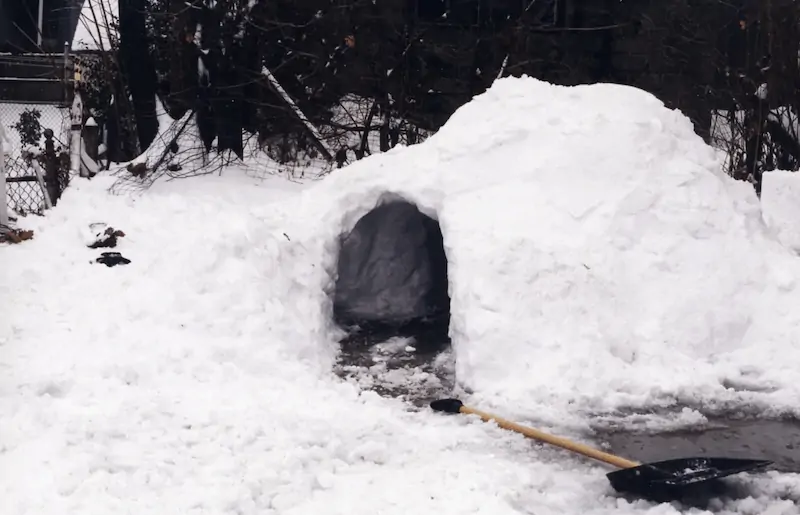
Something like this is enough to keep you warm, especially if you have a fire. However, building something like this without tools may take a lot of time which you don’t have. To build something smaller.
Warmth: Not a Luxury, a Necessity!
The next priority is now warmth. In the woods, especially, temperatures change quickly. Warmth is as important to the body as food, and if you are not warm enough, you will need more food. So you have to prioritize staying warm.
In the wild, the shelter can only give you a minimal amount of warmth. You have to use other ways to stay warm.
One trick was already mentioned above. If you are building a fallen debris shelter, make sure that it gets warm enough by adding a lot of leaves. In this type of shelter, you can have enough warmth by keeping yourself snuggled. This type of shelter traps in your body heat, keeping you warm and cozy.
If this does not work for you, you can try burying yourself in the dirt. This is proven to work. If the ground is too hard, or if you don’t have enough time to dig, fallen leaves and other debris can keep you warm.
But of course, the ultimate warming tool at your disposal is fire, if you know how to make it without the use of matches, firestarters, or any other tools. Unless you are some kind of a Bear Grylls and MacGyver combo, you probably won’t be able to start a fire.
You can try the spindle method, or simply rub two sticks together. But these friction methods of starting fires will just tire you out and all you will be able to produce are warm sticks.
It is better to conserve your energy and stick to the sure methods of staying warm. Nevertheless, if friction methods are your only hope, here are a few examples.
-
Hand Drill
The hand drill method is the most basic friction method of fire starting. It is this method where the spindle was derived.
To do the hand drill method, you need a long, dry stick. It should be around an inch in thickness and about 18 inches or more in length.
You need enough length so that you won’t run out of wood when you start the drilling process. You will also need a second piece of wood, flat and dry. Make a notch in the wood; the notch should be big enough to fit your stick.
Place the flat piece of dry wood on the ground, make sure it will not move when you rub the stick on it.
Hold the stick in an upright position into the notch on the baseboard. Put your tinder next to the notch. Tinder should be a finely divided, open, and easily flammable material.
Using your hands, spin the stick back and forth into the notch with a lot of downward force. What you want is to generate as much friction as possible. The more friction you have, the hotter the notch gets, the more chances the tinder will catch sparks.
When sparks touch the tinder and the tinder glows, blow on the tinder. The sparks should then form into a flame.
-
Fire Plough
The fire plough applies the same techniques as the hand drill, except instead of rotating the stick, you rub it back and forth on the plough (also called plow).
You will need a dry baseboard with a groove along its length. Your dry stick should have a dull point, which you will rub along the base board’s groove back and forth. The action will produce friction and dust.
With enough heat due to friction, the dust will ignite. Once you have enough ignited dust in the groove, you can put it in the tinder. Blow the tinder to grow the sparks in flame.
There are other ways to start a fire without matches. But these are the most effective ways to start a fire using only materials you’ll find in the wilderness.
Food: Keeps Your Strength
You last priority is food, believe it or not. The primary sources of food you may have in the wilderness are wild animals, plants, and bugs.
Unfortunately, catching wild animals is hard, even if you have gear. You have better hope with bugs and insects. Eating insects may be gross for you, but most insects are actually edible. They are also very nutritious.
If you don’t want to eat bugs, and can’t hunt animals, then you have to resort to plants. Make sure that the plant is definitely edible.
If you don’t recognize the plant, don’t eat it. If you happen to eat plants that makes you weak or have diarrhea, you might have just killed yourself.
But there is a way to test if a plant is edible. It is called the Universal Edibility Test. Though it works, there is a great risk involved in this test.
The idea is to slowly expose your body to a plant to see if your body will react. If the plant is poisonous, the effects will be minimal.
- For the test to work, you first have to fast for about 8 hours; that means no food, only purified water.
- Cut the plant into different parts (leaves, stem, root). Some parts of a plant may be edible while another is not.
- Rub a part of the plant on your skin. If no reaction occurs within eight hours, you may proceed.
- Cook a small portion of the plant. Cooked plants are better for the body than raw. Also, poisonous plants can lose their poison when cooked.
- Place a portion of the cooked plant on your lips for about three minutes. If there is any negative reaction, like itching, don’t continue.
- Place the portion into your mouth for 15 minutes. Don’t chew or swallow. Wait for reactions.
- If no reaction occurs, chew the plant for 15 minutes.
- Swallow the plant.
- If no reaction occurs within 8 hours, you can eat another, a bigger portion of the plant. It is best to cook it first.
- If no reaction occurs for another 8 hours, the plant is safe to eat.
Remember These, If You Want to Survive
The tips discussed here will get you the essentials for human survival. So remember them, if you want to survive next time you find yourself in the wilderness with NOTHING!