Camping and coffee go hand-in-hand. Thus, to most people, it is impossible to go camping without any of the equipment to use to brew coffee. But, the equipment you select should be able to roast your coffee to give the desired results.
Of course, among the things you will need to ensure are in place when planning for a camp is warmth and safety. Besides, you will need hot coffee during the cold evening and chilly morning.
Luckily, you have a dozen ways of making coffee while at camp. This article looks at how you can make percolator coffee on a campfire.
A percolator allows one to boil water and coffee to give it a special flavor. What’s more, is that the newer models will allow you to view the process through the doom.
Besides, they feature a knob that turns and draws coffee up from the bottom. As soon as the water at the bottom heats up, it is drawn up and drips in the upper chamber.
To make coffee in the Percolator, the first thing you will need to do is pour water into the bottom chamber. It is then placed over a source of heat for some time. Some coarsely ground coffee is then added while controlling the temperature. It helps to ensure that it does not overcook.
Table of Contents
Why a Percolator?
 A percolator features two chambers that allow you to get a burnt tasting coffee at the end of the process.
Sir Benjamin Thompson invented this wonderful equipment. Thompson was looking for a better way to boil coffee because he disliked tea and hated alcohol.
So, he developed a percolator to help him brew his favorite coffee at home. The evaporator later evolved into a pressure cooker. Thus, modern Percolator allows for continuous whirl allowing the coffee to mix with water in the chambers.
The process of moving up and down makes the darker roasted coffee to get even better. If the actual beans are left to percolate, you end up with a superior tasting cup of coffee. However, to make the process easier and quicker you can pick a Camping Coffee Percolator that is well-designed and durable.
What Do You Need to Prepare a Percolator Coffee?
- Water
- A percolator
- Quality burr coffee grinder
- Weighing scale
- Timer
- Sugar
The Procedure
Fill the bottom chamber with water and grind the beans using a coffee grinder. The ground coffee should then be placed in the top chamber. Cover the rig with a lid and place the Percolator on a campfire. Listen to the bubbling or perking sound.
Note that brewing coffee at the campfire using a percolator needs some experience. Here is one of the procedures you may use.
A tablespoon of coffee should be put into a percolator full of water and placed on the campfire grill grate. Ensure to control the amount of fire by moving the Percolator away from the direct flame.
Take some time to allow it to simmer. Placing it directly on the campfire makes it to boil instead of simmering because of the high temperature of the fire.
Simmering perfects and enhances the flavor. You must keep your eye on the dome to ensure that the coffee goes past the pale color but doesn’t get too dark.
Source of Fire
A camp stove could be a good source of fire. Once the Percolator is placed on it, all you need to do is to heat it until it boils. Also, it allows you to regulate the amount of heat reaching the Percolator. This is necessary if you want to better the results.
Often, you will need to remove the pot from the source of heat and stir it. But since you are at a campsite, you may not have a stove.
So, let’s see how you can use the campfire to make your coffee.
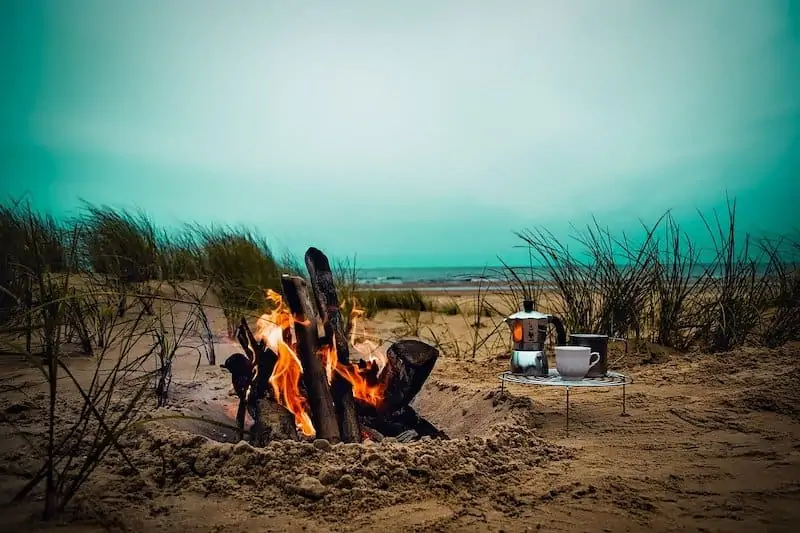
Using the Campfire
The procedure is simple since no special equipment other than a percolator will be used. If you have already lit the fire, you will be good to go.
After assembling everything you will need, the next thing you will need to do is to prepare your campfire. Once it is ready, place the Percolator on top of hot coals. But, ensure there is enough firewood to keep the fire until the brew is prepared.
Filter the water: If you want the best results; ensure you filter the water you use. Filtered water gives the best results. You may also use clean drinking water if you cannot filter the water.
How Does The Percolator Work?
The coffee maker sends the boiling water through the stem into the basket used to hold the coffee grinds. Water will continue to be recycled through the grinds until it boils. You will then need to attach your basket to the stem and add some coffee.
If your campfire is ablaze, you may need to be careful because it may not take long before the coffee is ready. Set the Percolator near the flame to allow the water to boil. You can easily tell if it is boiling by watching and listening to the water as it rises into the upper part of the dome.
The percolator should be moved away from the direct flame as soon as the water starts to boil. Luckily, the percolator comes with a wooden handle that allows you to remove it from excess heat.
Once you remove it from the direct flame, give it 5-10 minutes to allow it to percolate. Watch the coffee turn and change color until it attains the strength you want.
But, you may not get excellent results in your first brew. However, if you repeat the process again and again, you will get the desired results.
As soon as the coffee has percolated and attained the requisite strength, pour it into a coffee maker. At this point, the lid may be too hot, so ensure you use a towel to protect yourself from hot steam.
Final Thought
A camping coffee maker like a percolator makes the job of preparing coffee at the campfire easy. It allows you to enjoy a fresh cup of coffee every morning and evening.
Test the coffee continuously until you feel it has attained the right standard. Once you are satisfied with the brew, serve yourself to wade off the chill.